How-to: Add policy categories in bulk

As long as you are not using a direct accounting integration, you can manually add categories in your policy settings. This can be done for group policies and personal policies.
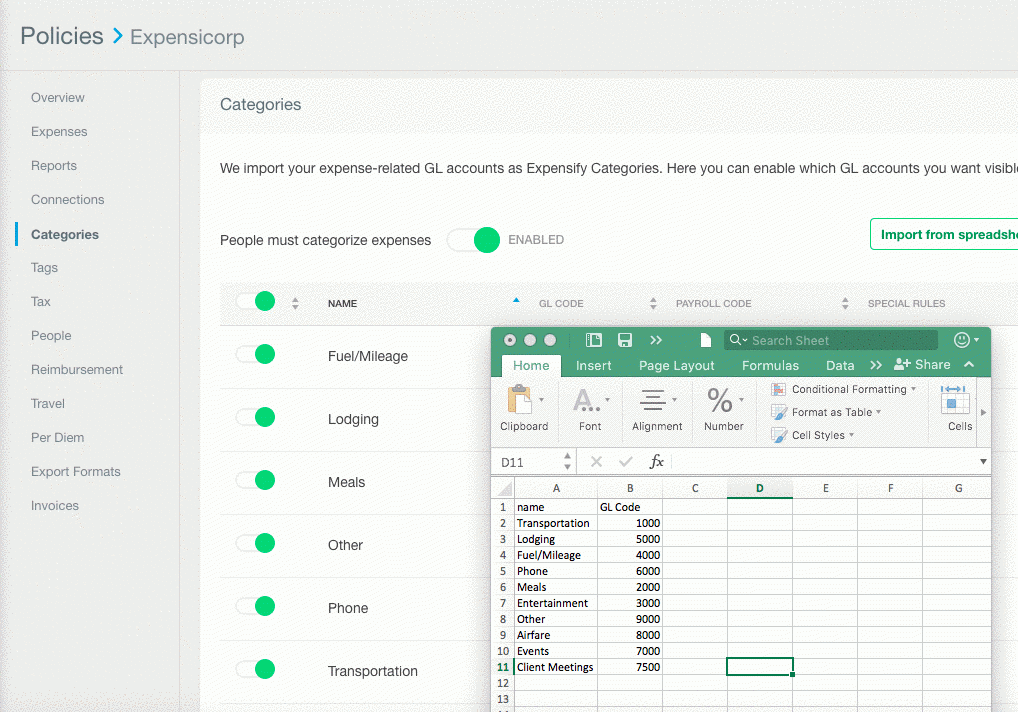
1. First, create a spreadsheet of these categories/accounts, and save this as a CSV file. Find a handy template you can use for this here.
- One column (column A) should be the user-facing account name (the "category" the user will select on their expense edit screen).
- A second column (column B) can have the GL number associated with the account.
Here is an example of what this file looks like:
2. Upload this file into the Categories section of the policy, under Settings > Policies > Group > [Policy name] > Categories if you are a Policy Admin for your group policy, or under Settings > Policies > Individual > [Policy name] > Categories for your personal policy.
Here's an example of how to do this:
- If you make a mistake or need to otherwise update your list in bulk, you can always click "Export to CSV" to export this exact spreadsheet, make the amendments, and then import it again.
- If you are using a Control level group policy, you will also be able to add category-specific rules in bulk rather than amending them one a time. Export the current list to a CSV to see this format, then make the amendments before re-importing your list.


