How-to: Connect to Sage Intacct - Role-based Permissions - Vendor Bills

Follow the steps below to connect Sage Intacct using role-based permissions and export as Vendor Bills.
Checklist of items to complete:
- Create web services user and setup permissions
- Enable Customization Services (only applicable if you don't already use Platform Services)
- Create test policy and download Expensify Package
- Upload the Package in Sage Intacct
- Add web services authorization
- Enter credentials and connect Expensify and Sage Intacct
- Configure integration sync options
Step 1: Create a web services user with role-based permissions
- In Sage Intacct, click Company then click on "+" button next to Roles
- Name the role, then click Save
- Go to Roles > Subscriptions for the "Expensify" role you just created
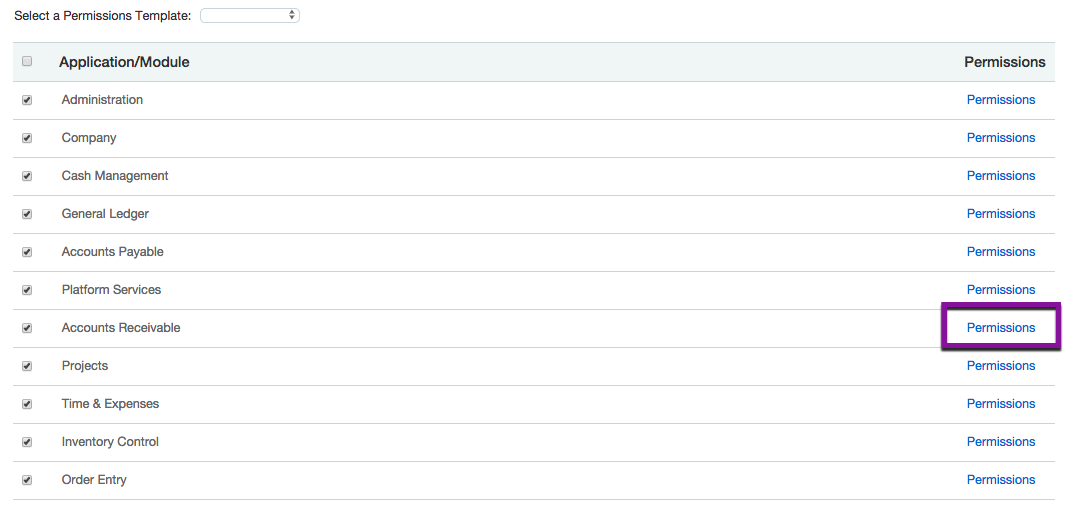
- Set the permissions for this role by clicking the checkbox and then clicking on the Permissions hyperlink
These are the permissions this role needs to have when exporting reimbursable expenses as Vendor Bills:
- Administration (All)
- Company (Read-only)
- Cash Management (All)
- General Ledger (All)
- Accounts Payable (All)
- Projects (Read-only) (only required if you're going to be using Projects and Customers)
Now, you'll need to create a web services user and assign this role to that user.
- Company > Web Services Users > New
Set up the user like the screenshot below, making sure to do the following:
- User ID: “xmlgateway_expensify"
- Last name and First name: "Expensify"
- Email address: your shared accounting team email
- User type: "Business"
- Admin privileges: "Full"
- Status: "Active"
- To assign the role, go to Roles Information
- Click on the "+" icon, then find the "Expensify" role and click Save.
Step 2: Enable Customization Services (only applicable if you don't already use Platform Services)
To enable, go Company > Subscriptions > Customization Services (if you already have Platform Services enabled, you will skip this step).
Step 3: Create a test policy in Expensify and download Expensify package
The test policy will be used as a sandbox environment where we can test before going live with the integration. If you're already using Expensify, creating a test policy will ensure that your existing company policy rules, approval workflow, etc remain intact. In order to set this up:
- Go to Settings > Policies and click New Policy from on the Expensify website.
- From the Settings > Policies > [Group Policy Name] > Overview page, name the policy something like "Sage Intacct Test Policy"
- Once created, navigate to the Settings > Policies > [Group Policy Name] > Connections > Accounting Integrations > Connect to Sage Intacct
- Select Create a new Sage Intacct connection/Connect to Sage Intacct
- Select Download Package (All you need to do is download the file. We'll upload it from your Downloads folder later.)
Step 4: Upload Package in Sage Intacct
If you use Customization Services:
- Customization Services > Custom Packages > New Package > Choose File > select the Package file from your downloads folder > Import
If you use Platform Services:
- Platform Services > Custom Packages > New Package > Choose File > select the Package file from your downloads folder > Import
Step 5: Add web services authorization
Go to Company > Company Info > Security in Intacct and click Edit. Next, scroll down to Web Services authorizations and add "expensify" (this must be all lower case) as a Sender ID:
Step 6: Enter credentials and connect Expensify and Sage Intacct
Now, go back to Settings > Policies > [Group Policy Name] > Connections > Accounting Integrations > Configure > Connect to Sage Intacct and enter the credentials that you've set for your web services user. Click Send once you're done.
Step 7: Configure your connection
Once the initial sync completes, you will receive the error No Expense Types Found if you aren't using the Time and Expenses module. Close the error dialogue and your configuration options will appear. You will need to switch the reimbursable export option to Vendor Bills and click Save before completing your configuration.
Once the sync completes, you'll be able to click Configure and complete your setup.


