How-to: Assign and Unassign Company Cards

Assign company cards
After connecting your company cards with Expensify, you can assign each card to its respective cardholder.
To assign cards go to Settings > Domains > [Your domain] > Company Cards.
If you have more than one card feed, select the correct feed here in the drop-down list in the Company Card section:
1. Select the cardholder
You can search the list for all employees' email addresses. Please note that the employee will need to have an email address under this Domain in order to assign a card to them.
2. Select the card
You can search the list using the last 4 digits of the card number. If no transactions have posted on the card then the card number will not appear in the list. You can instead assign the card by typing in the full card number in the field.
Note: if you're assigning a card by typing in the full PAN (the full card number), press the ENTER key on your keyboard after typing the full PAN into the card field. The field may clear itself after pressing ENTER, but click Assign anyway and then verify that the assignment shows up in the cardholder table.
3. Set the transaction start date (optional)
Any transactions that were posted prior to this date will not be imported into Expensify. If you do not make a selection, it will default to the earliest available transactions from the card. Note: We can only import data for the time period the bank is releasing to us. It's not possible to override the start date the bank has provided via this tool
4. Click the Assign button.
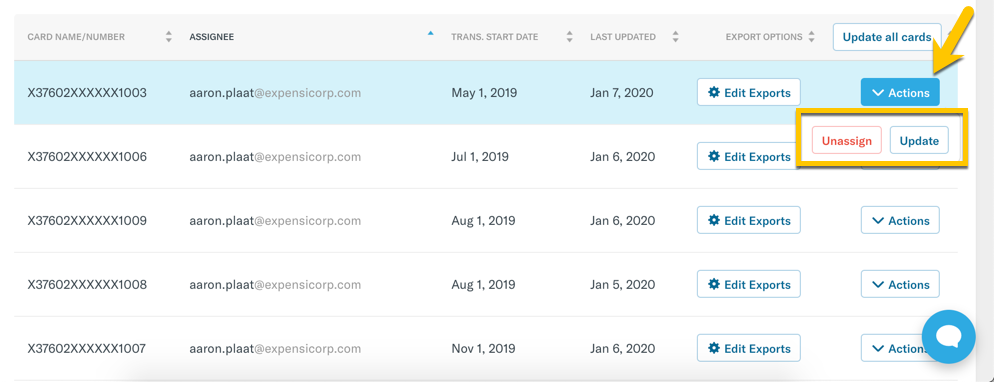
Once assigned, you will see each cardholder associated with their card as well as the start date listed.
If you're using a connected accounting system such as NetSuite, Xero, Intacct, Quickbooks Desktop, or QuickBooks Online, you can also connect the card to export to a specific credit card GL account.
- Go to Settings > Domains > [Domain name] > Company Cards
- Click Edit Exports on the right-hand side of the card table and select the GL account you want to export expenses to
- You're all done. After the account is set, exported expenses will be mapped to the specific account selected when exported by a Domain Admin.
Unassign company cards
Important!
Unassigning a company card will delete any unsubmitted (Open or Unreported) expenses in the cardholder's account.
If a cardholder leaves the organization, click the Actions button and then click "Unassign."
To completely remove the card connection, unassign every card then refresh the page.
Note: If expenses are Processing and then rejected, they will also be deleted when they're returned to an Open state as the card they're linked to no longer exists.
Related Articles:


