Setting up a client on Expensify

Admin Settings
Step 1: When setting up a new client you will want to start by creating a policy in the Admin section. Please click on the Settings > Group > Policies.
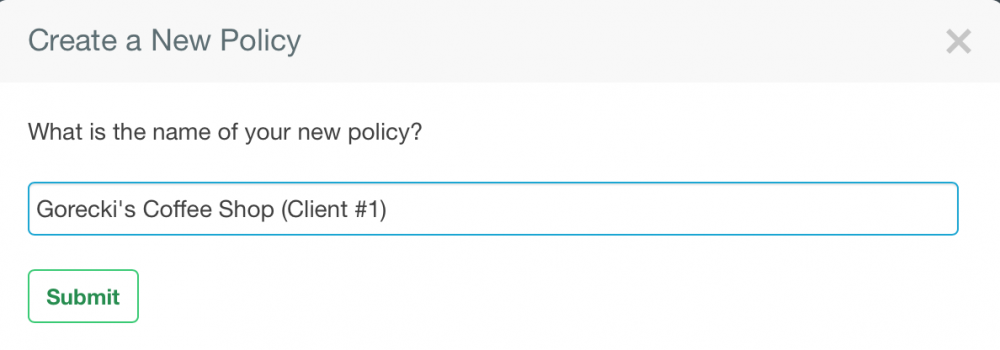
After clicking "New Policy" please decide if your team is going to control the billing or your client.
Option 1:
Looking to have your client control the billing? When creating a new policy please select "Create for another account". This will allow you to pass the billing to your client. Please add the email address for your client and the name of the policy. Don't see this option? Please reach out to our in-house chat solution to get this setup in your account!
Option 2:
The Accountant or Bookkeeper will control the billing, the policy owner will need to add a billing card for your company to continue using Expensify. Navigate into Account Settings, and select the Payments tab to add this information!
Step 2: After you click "New Policy" please name your policy by your clients domain name. Check out a short video on this here!
Step 3: After you have created the policy please walk through the Inbox questions to finalize your rules for your client. Looking to setup another client? Please repeat steps 1-3.
What is a policy?
A policy is the set of rules, settings, and spending limits for expense reports in your organization. This includes the unique expense categories and tags, expense amount thresholds, currency and tax settings, etc. that all policy members will use. A policy will also define the approval workflow for your clients, as well as the accounting connection if you're integrating an accounting software. You can even set up multiple policies at no additional cost if you need to define separate groups with varying settings! Check out the differences here!
Overview
This tab allows you to name your policy and determine what plan you're on!
Expenses
Let's set some basic guidelines for your clients policy. Broken rules will be flagged as violations.
Max Expense Age — how old an expense can be on a report
Max Expense Amount — how large a single expense can be
Receipt Required Amount — the minimum threshold for requiring receipt images
Reports
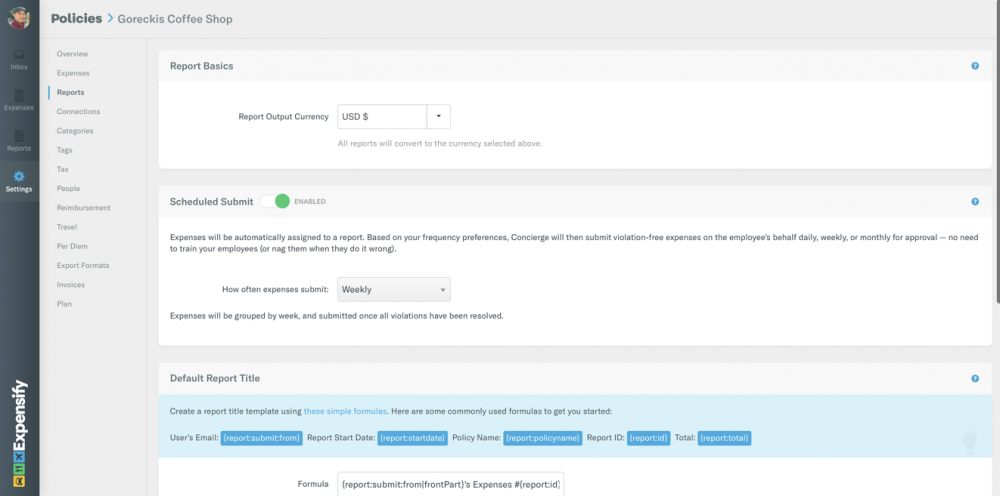
In the reports tab, you can set the output currency and enable automation features. Scheduled Submit will auto-create reports for clients and submit violation-free expenses at a frequency of your choice. All the client has to do is SmartScan receipts and we'll do the rest of the work for them!
Connections
Looking to integrate with your clients accounting system? Take advantage of our setup guides:
- Quickbooks Online
- Quickbooks Desktop
- Xero
- NetSuite (Token)
- NetSuite (SSO)
- Intacct (Role Based, Expense Report)
- Intacct (Role Based, Vendor Bill)
- Intacct (User Based, Expense Report)
Looking to export reports into your accounting system? Watch our accounting integration videos to get yourself situated.
- Exporting into Quickbooks Online
- Exporting into Quickbooks Desktop
- Exporting into Xero
- Exporting to Intacct
- Exporting into Netsuite
️Categories
Use the categories tab to enable/disable which chart of accounts are available for clients to code expenses with. If you'd like to set a limit for a particular category, you can do so by selecting the blue cog.
People
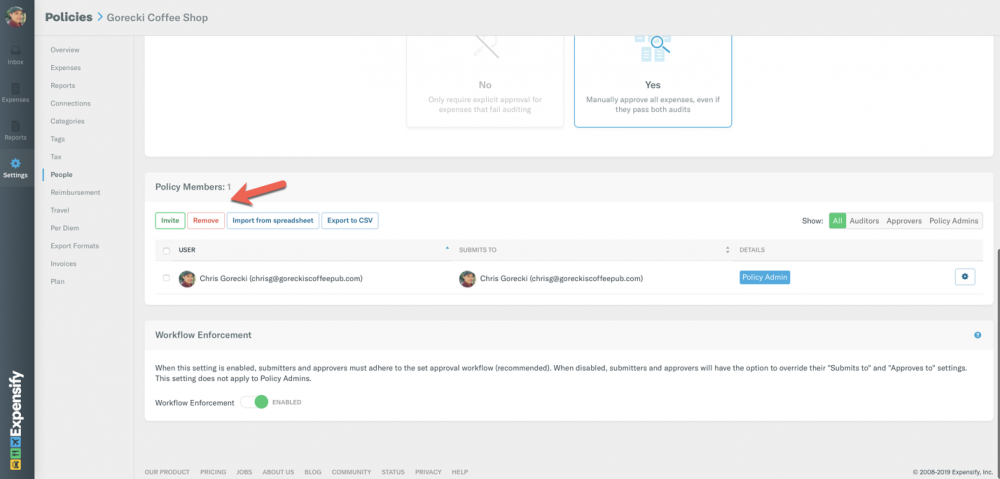
Use the People tab to invite new client to join your company policy. Check out our Approval Workflow options after you have invited your team:
Looking for Client training? Please check out our client training guide here!
Domain Control
️Company Cards
Go to Settings > Domain Control > [Domain Name] > Company Cards > Import Card/Bank to add company cards. Once your cards are added, assign them to employees and set the transaction start date! Check out a short video on this here! Is your domain not verified? Reach out to our team for assistance! Also sign up for our company card administration webinar here.
Partner Discounts
There are five tiers of ExpensifyApproved! partners, based on the number of monthly active users that you help bring to Expensify. Increase your tier status by onboarding more clients and watch the discounts grow!
Looking for more information? Please check out our website here!
Support
As questions come up, be sure to reach out to our Success Coach team. In order to do this please click on the message icon in the bottom right corner, and then click New Message:


