Deep Dive: All about the Expenses page

The Expenses page is hands-down one of my favourite parts of Expensify! It’s a one-stop shop for so many things, so let’s look at what you can do from here!
Filter for expenses

You can filter by:
- Date Range
- Merchant Keyword (a partial work will return the most results)
- Billable or Reimbursable status
- Whose expenses (if you are an Admin you can see all expenses on your Policy)
- Category/Tag
- Card used, or Cash
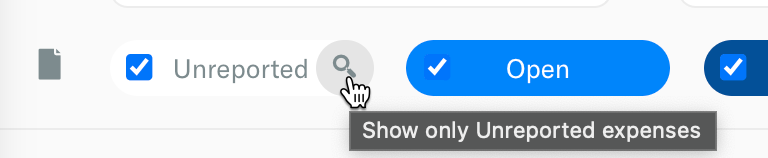
To filter by status, check the ones you want or, for just one, hover over the button and then click the magnifying glass icon:
Add to reports
Here’s a super quick way to build reports…
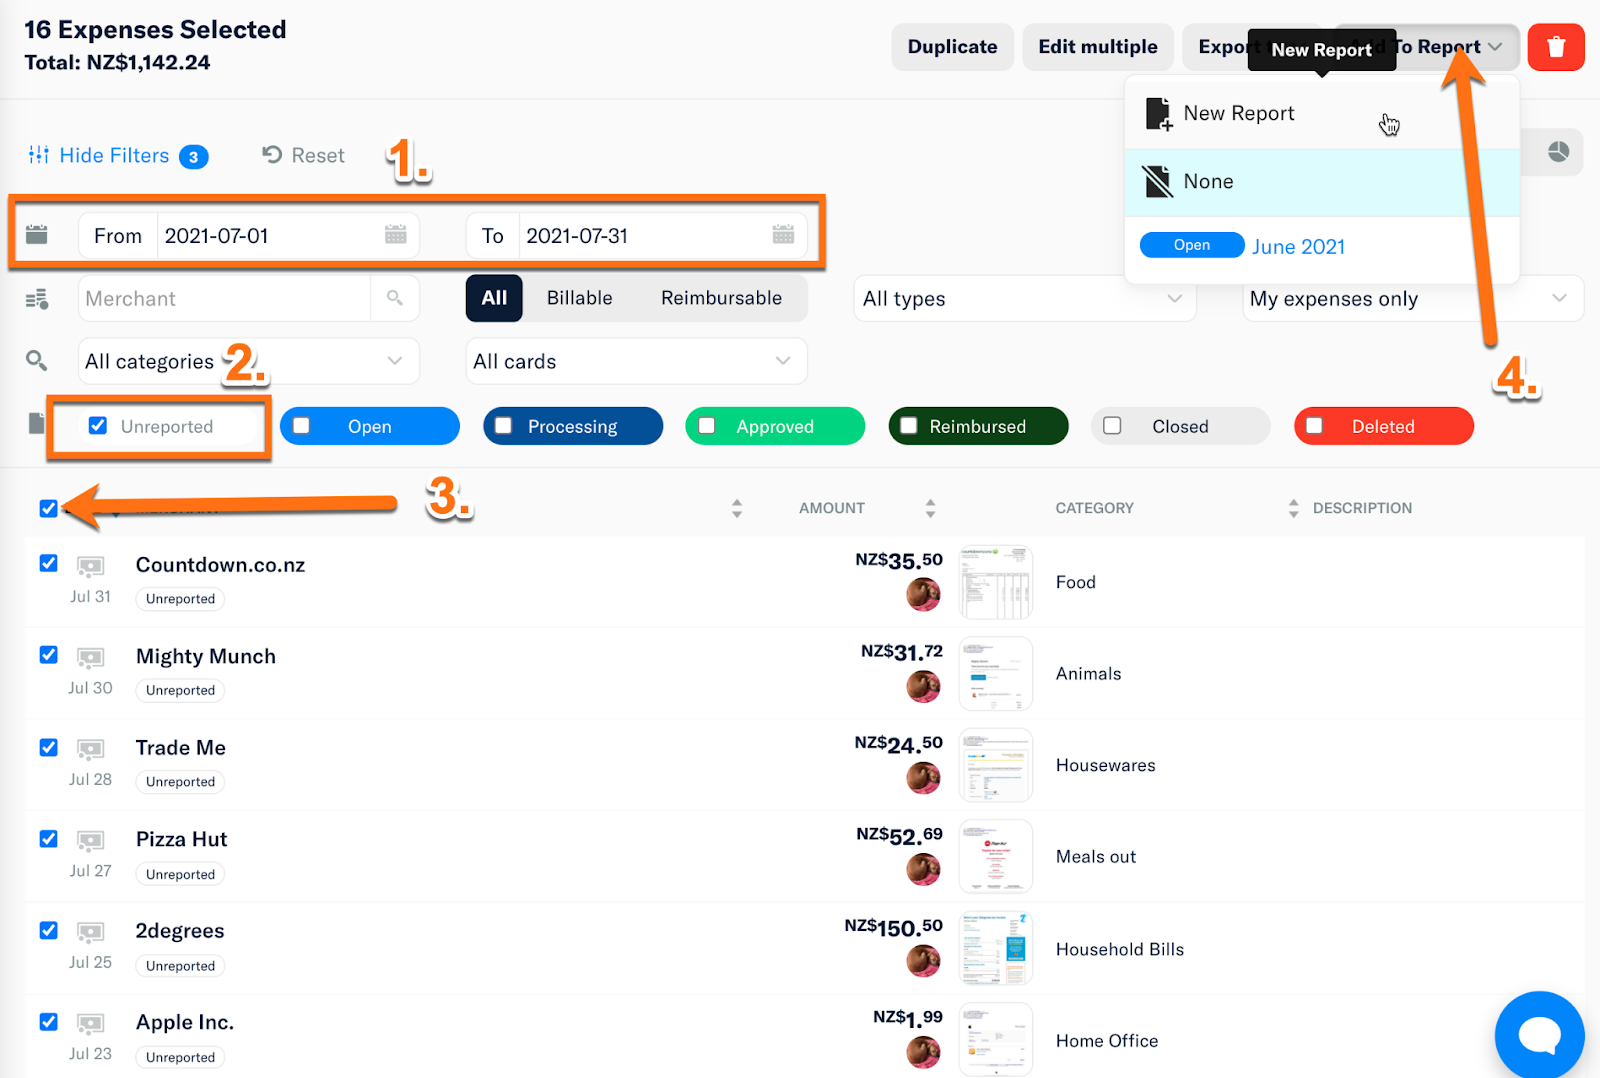
- Filter for the date range you want
- Select only Unreported
- Select ALL
- Add to Report > New Report
Coding in-line
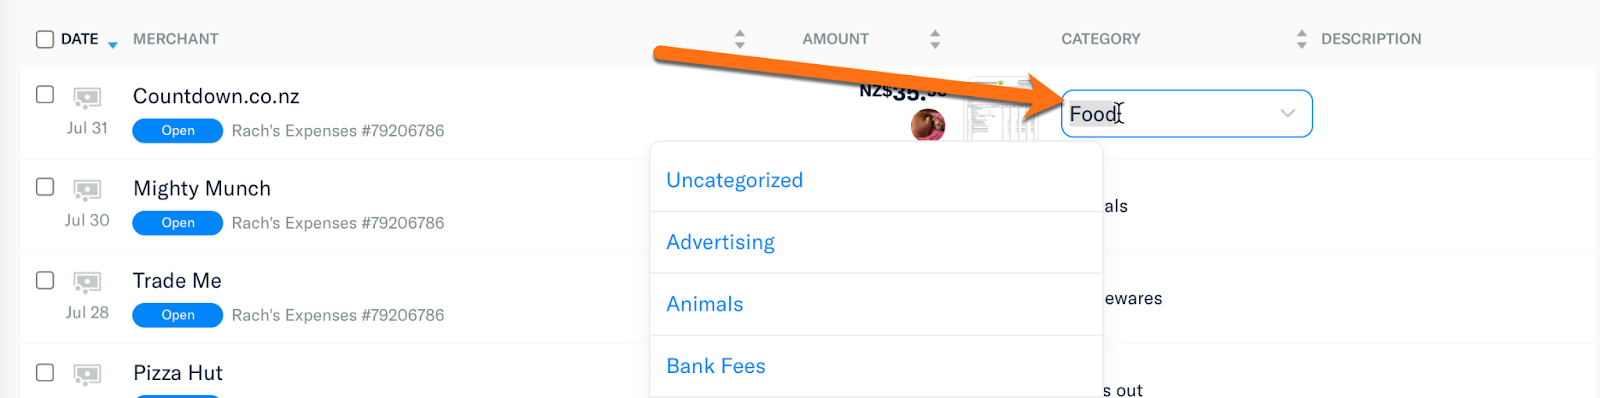
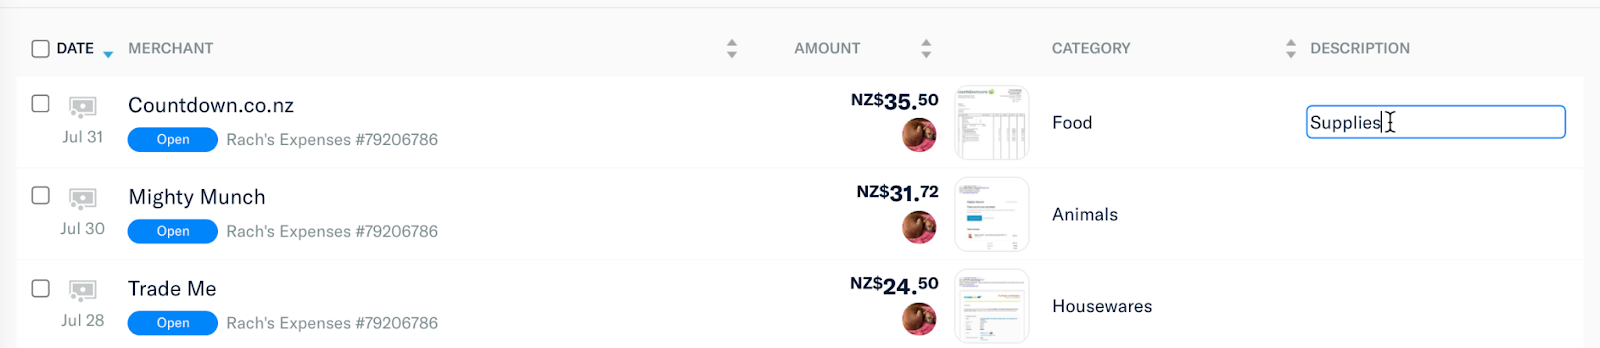
Another super-quick way to prep your reports is to do the coding in-line on the Expenses page. Just click into the relevant coding ‘cell’ on this page to add or edit the category or tag, or add a Decription.
You can also filter for ‘Uncategorized’ to help you find anything you may have missed coding.
Edit Multiple
If you need to change expenses in bulk, e.g. from Category X to Category Y, or from reimbursable to non-reimbursable etc, you can also do this from the expenses page.
Exporting
You can also select expenses or Select All and Export To a CSV file. You can create your own export formats to analyse your expenses.
View
You can adjust your view to get the most effective layout for what you need to do.

The 'skinny line' view is the best option for coding on-screen. The next line-view is just a little larger. The Thumbnail view will give a clear image of receipts with the coding underneath and the Analytics view is more for analysis.
Related Articles:

